WAMP (Apache, PHP and MySQL for
Windows) provides the popular combination of Apache with the PHP
server-side language and the MySQL database in one easy-to-install
package.
1. Download latest release of wampserver 2 from
http://www.wampserver.com/en/.
2.
Before install WAMP server , check wethere you have already installed.
If yes, first uninstall the existing installation of apache.
3. Once download double-click the file to launch the installer.
4. The setup is self-explanatory. At one point you will be asked where you want to have your
www root folder.
This www folder is simply where your web pages will be loaded from. It
doesn't really matter what you choose and you can always change it
later.
After the installation you should have a fully functional Apache web server with PHP and MySQL.
5. To launch your web server go to
Start › All Programs › WampServer (or wherever you installed WAMP to) and click
start WampServer. You'll
notice a small icon in the bottom right corner of your screen changing
from red to white. That was just the WAMP server that booted up. By
left-clicking on the icon you'll get to the server options. The meaning
of the icon status changes are shown below:
Offline mode
means that only you, from your computer, can access your server.
External access will be blocked (indicated by the black lock in the
icon). This is the default setting and should always be used for website
testing.
Online mode on the other hand means that
everyone can access your server from anywhere. This is option is for
using your computer as a live web server should you intend to do that.
Now we're going to try to access your server locally with a web browser:
1. Make sure WAMP is up and running in offline mode.
2. Enter l
ocalhost into your browser bar and hit enter.
If you didn't provide a different
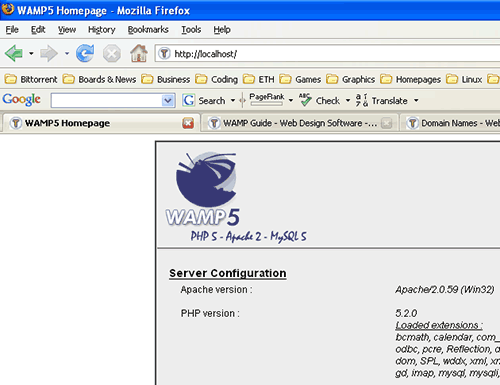
www root directory when installing WAMP the default page should have loaded:

What
localhost does is simply to look for an
index file (in this case
index.php)
in your www root folder and load it into the web browser. You can go to
that folder (usually C:/Program Files/wamp/www/) and check for yourself
that such file indeed exists.
You could now start building your
own website by replacing the index file with your own index file
(index.php, index.html, ...). Every time you'd made a change to your
website you'd hit F5 in your web browser to load the most recent
version.
Accessing your server from anywhereSuppose
you've created a cool website and want to show it to your friend who's
living halfway around the globe, sitting in front of his computer. You
only have your website on your local machine. Very similar to the
looking up a web page with its IP exercise you're going to tell your
buddy to enter your
IP into his web browser bar.
Your friend's web browser will then try to establish a connection with your computer over
port 80 (standard port for speaking to web servers).
Apache
will catch this request and send the index page located in your www
root folder to the web browser which in turn will interpret its
containing HTML code and display it as a good old
web page.
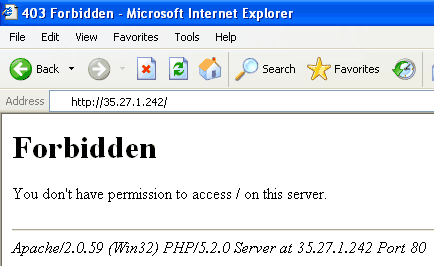
However, if WAMP runs in
offline mode your friend will see the following in his web browser upon entering your IP:

WAMP external access error
Try it for yourself:
1. Make sure WAMP is running in
offline mode.2. Enter your IP 78.8.6.29 into your web browser bar and hit enter.
To allow external connections to your server you have to restart WAMP in online mode.
1. Left-click the WAMP icon and select Put Online.
2. Wait for the icon status to change to white again.
3. Enter your IP 78.8.6.29 into your web browser bar and hit enter.
4. If you get the same forbidden page as before hit F5 to let the browser load the newest version.
5. If it's still not working you probably have to enable
port 80 forwarding in your
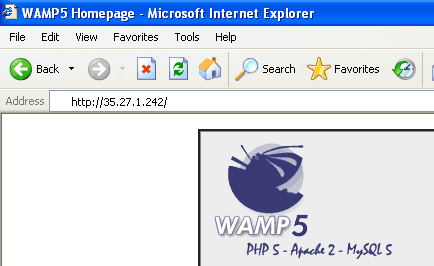
router configuration.Finally your buddy can see your homepage!

WAMP external access success
Change Apache's www root directorySometimes
it's necessary to change your current www root folder to something
else. Maybe you have all your work files on a different partition than
where you installed WAMP to or you have several websites you're working
on and need to make one of them your primary site for a while (the one
that shows up when entering
localhost).
Anything that has to do with
Apache configuration can be done within a file called
httpd.conf.
1. WAMP provides quick access to certain important files, one of them being
httpd.conf.2. Left-click WAMP icon and select
Config files › httpd.conf.
3. The file will probably open up in Notepad.
1. Press
Ctrl+F and enter
documentroot.
2. Make sure case sensitive search is disabled and hit enter.
3.
You'll find some descriptive text and below a line that looks like
DocumentRoot "C:/Program Files/wamp/www".
4. Copy that line then put a # in front of it: #DocumentRoot "C:/Program Files/wamp/www".
5.
Paste the copied line just below and adjust it to where your custom
root folder is located (e.g. DocumentRoot "C:/my_cool_site").
6.
Resume the search (usually by pressing F3) and you'll find a line like:
<Directory "C:/Program Files/wamp/www">.
7.
Again copy the line, put a # in front, paste copied line below and
adjust it (e.g. <Directory "C:/my_cool_site">).
8. Save and close the file.
Whenever
you make a change to httpd.conf you have to restart Apache for it to
take effect. The # we've added in front of the old lines turns them into
a comment which Apache ignores. We just added them so that we can
easily switch back to an old configuration by uncommenting the lines.
1. Left-click the WAMP icon and select Apache › Restart Service.
2. Wait for the icon status to change to white again.
The
root directory should now have changed to then one you've entered in
httpd.conf. You can test this by entering localhost in your web browser.
The index page in that folder (or the lack thereof) should show up now.